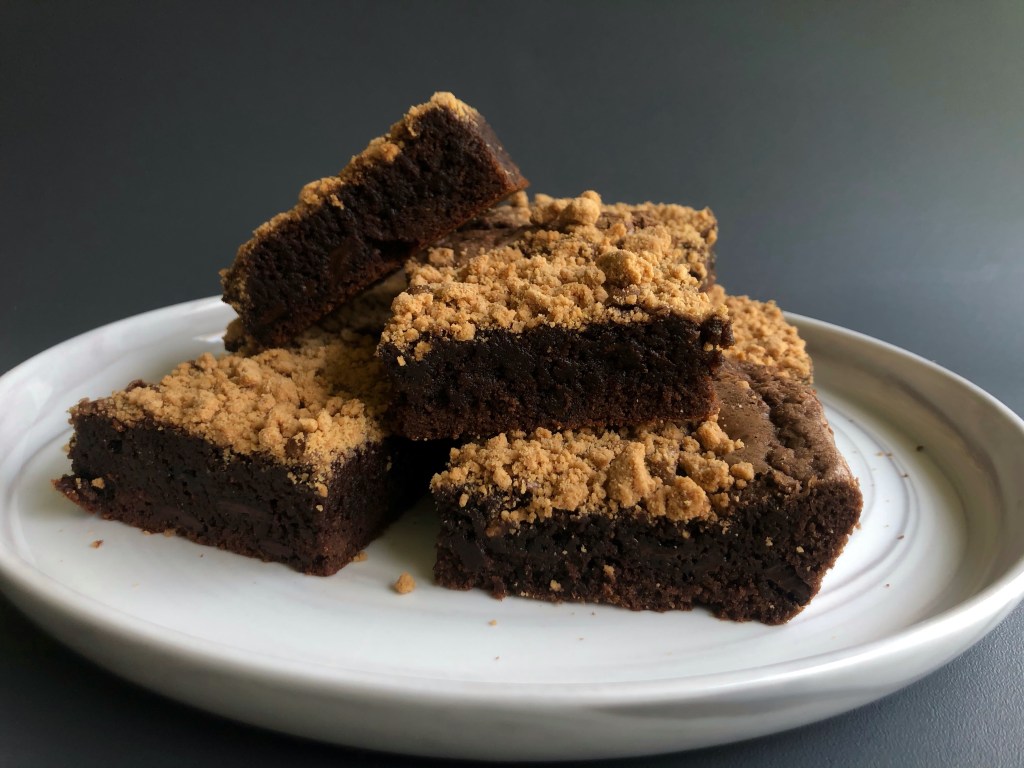
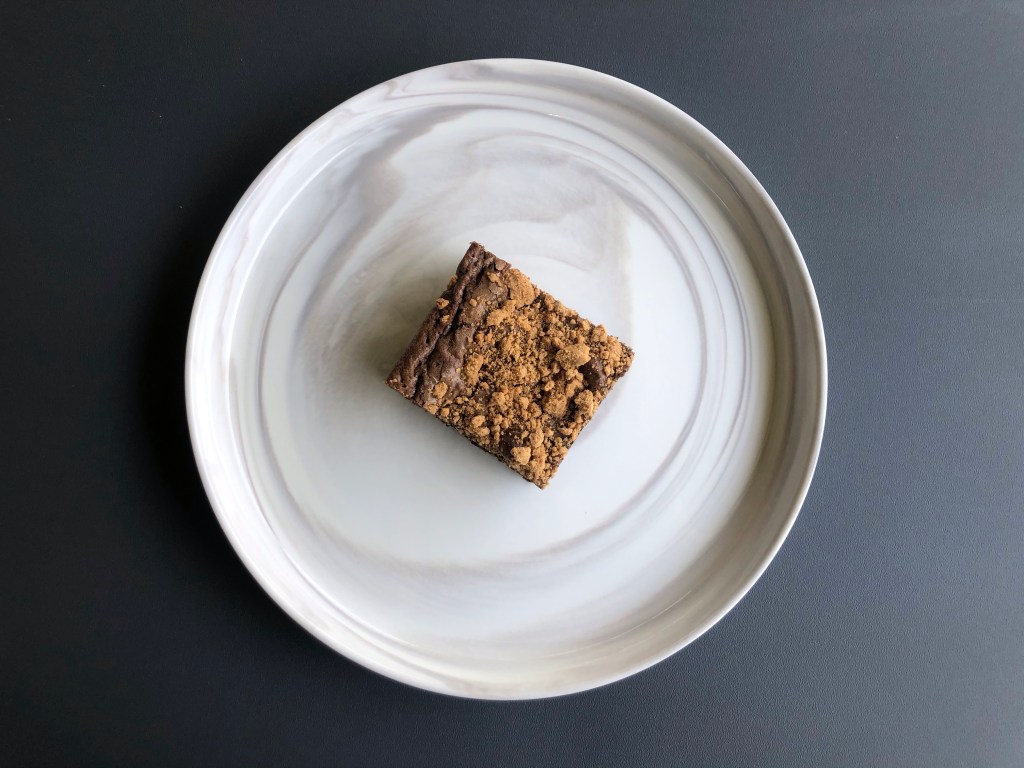
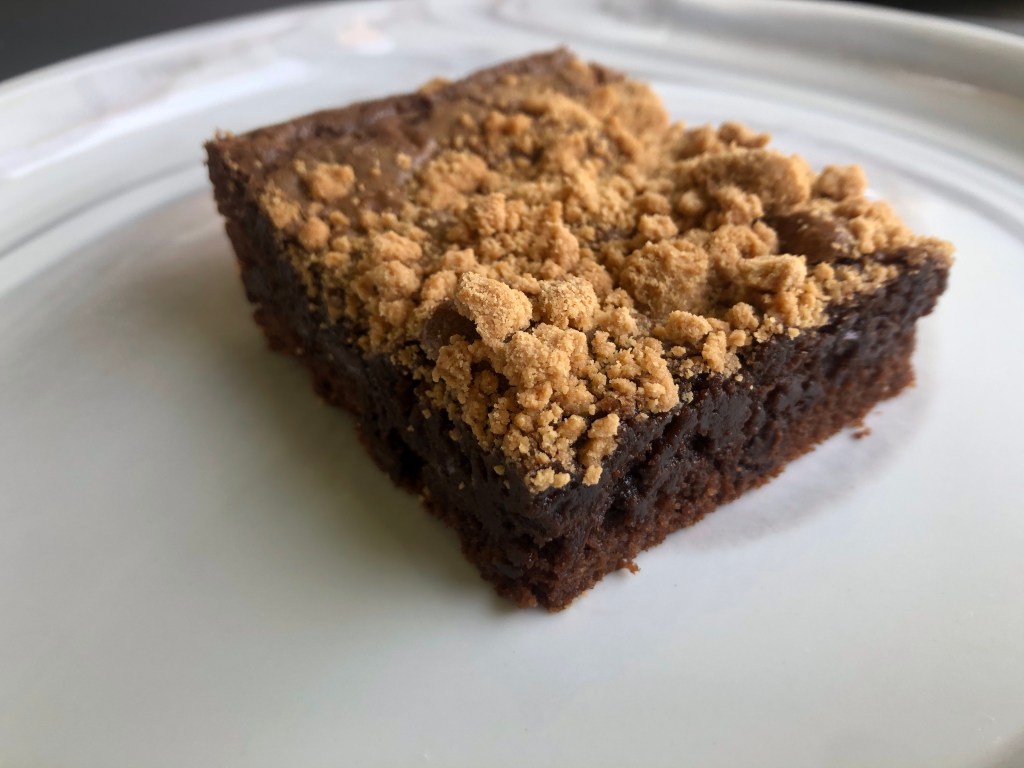
Fudge or Crust? What’s your favorite part of a Brownie?
Brownies are the perfect dessert to bring to a party or a dinner with friends or family.
EVERYBODY LOVES BROWNIES!
But what is the deal whit this delicious treats? … To be honest brownies are not good for you, but we aren’t here to talk about sugar issues. We love brownies because the effect that have on us the main ingredients:
Butter: It gives the brownie the creamy texture when mixed with chocolate. (fat + fat = smoothness) This is the key for the fudge effect.
Chocolate: Do you need a good quality chocolate? Well … it depends on your taste. Try buying real chocolate for pastry, it will make a big difference in brownie’s flavor. Chocolates with too much sugar won’t get you there.
Sugar: Do you like crispy crusts, try using brown sugar instead. It would help caramelize the edges.
Now let’s get to business…
The Recipe
This Recipe makes around 12 individual brownies.
Ingredients:
220 g Butter
230 g Chocolate
212 g Suagr
4 Eggs
5 ml Vanilla
2 g Baking Powder
3 g Salt
240g Flour
170 g Chocolate Chips*
* Can be substituted with nuts or dried fruit *
Method:
Melt de butter either on the microwave or stove, add chocolate and let it melt with the heat of the butter (add more heat if needed). Let it cool and mix with the eggs, vanilla, salt and sugar (if you want a fudge type of brownie, don’t over mix it).
Combine the baking powder and flour. Add the dry ingredients and chocolate chips to the chocolate mix.
Add butter and flour to a mould and spread the brownie mix in an even layer. Bake at 180ºC from 35 to 45 minutes.
Let the brownie cool for 20 minutes, then take it out of the mould while it is still warm. Let it cool completely before cutting and enjoy!
If you happen to make this recipes … SHARE IT WITH US! 🙂 @mrssublimebakes on Instagram.
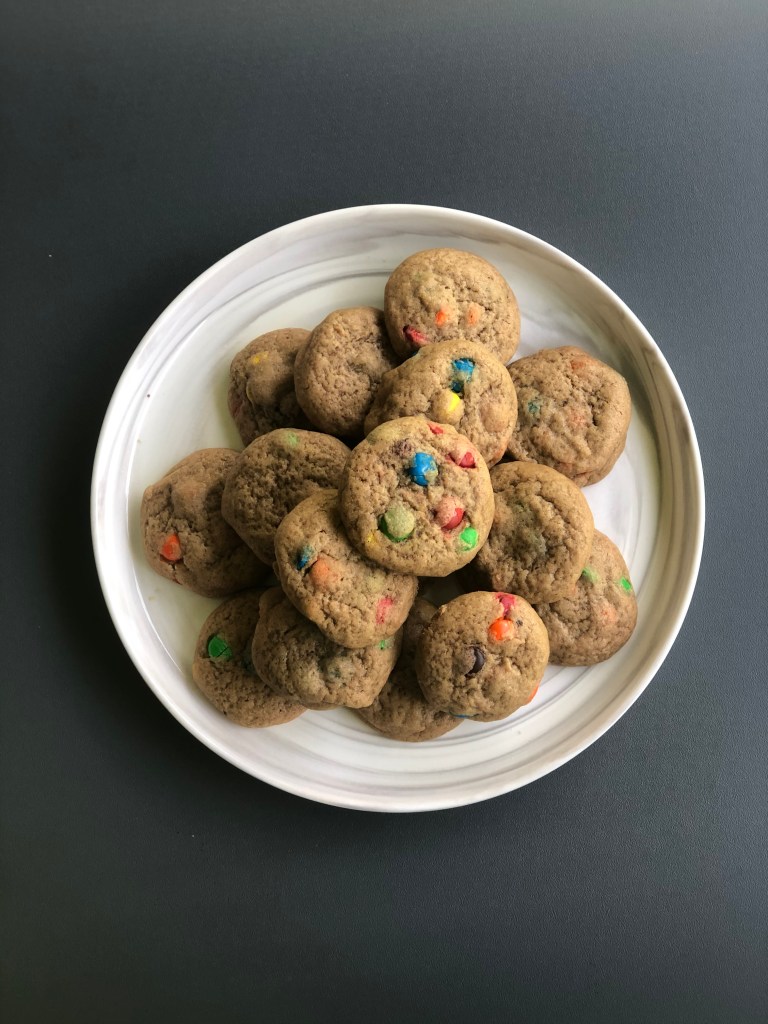
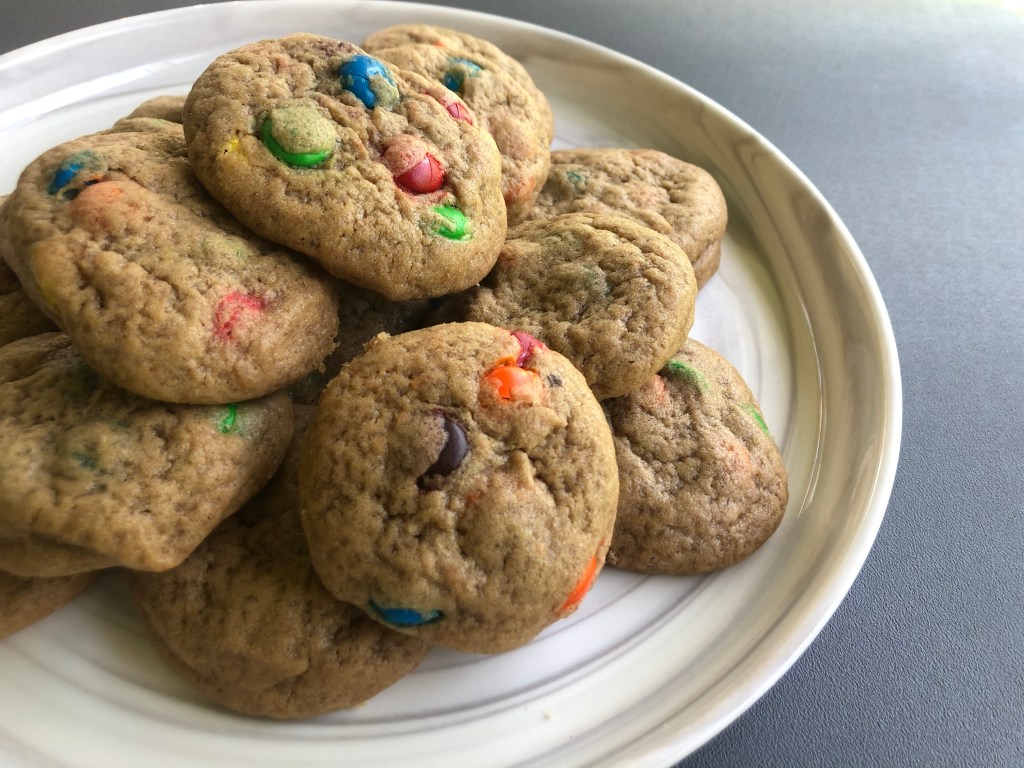
These are a real treat … but be careful! Too much of these delicious cookies could give your kid a long lasting sugar-rush.
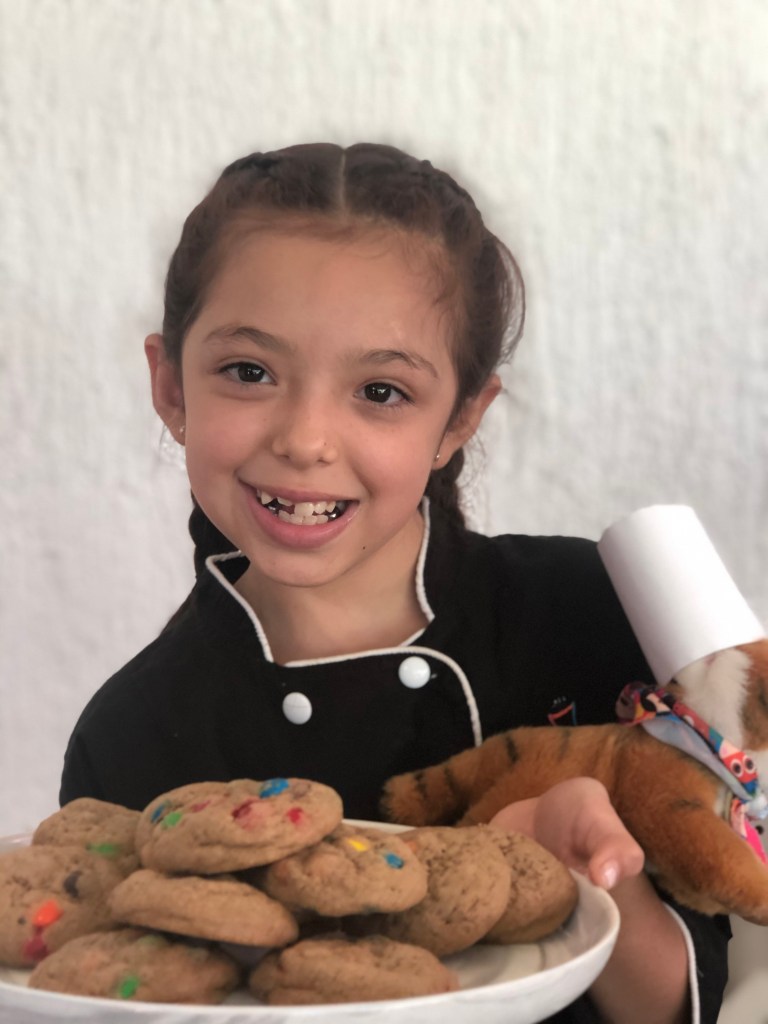
I have been thinking a lot during this quarantine about how could I help my niece @redhair_royalty learn a bit more English, so we started some online cooking classes in Spanish/English.
The classes are taking place some Saturdays at 11:40 am (CDT), summer is around the corner and I don’t want her to loose the habit of studying. I have given lots of pastry courses to children, adults and even to college students. This classes are transmitted live for free through my instagram account @mrssublimebakes. We want to invite you to join us and practice your Spanish/English and cooking skills. If you have kids at home, this could be a nice way to keep them entertained (with the help of an adult).
This recipe is the first of the “Kids Bake-Along” series, and more to come.
The Recipe
This Recipe makes around 15 cookies of 40g each.
Butter 100g
Brown Sugar 150g
Egg 1
Flour 225g
Baking Powder 4g
Vanilla 5ml
Salt 1g
M&M’s 120g
Get your butter to room temperature and cream it with the sugar and salt. (You can use a handmixer, mixer, whisk or spatula) Make sure the sugar is well combined.
Add the vanilla and the egg and mix again. In a separate bowl, combine the baking powder and flour together. Add the dry ingredients and mix until incorporated. (Don’t over mix it!) Get the M&M’s in there and try to distribute them evenly with a spatula or a spoon.
Grab a bit of batter and with the help of your hands, form a well rounded ball. Keep doing that until you are finished with all the batter. (Make sure all the balls are the same size so they can bake evenly)
Freeze the balls for at least 15 min, until they are hard. Preheat the oven to 180C.
Place the frozen balls in a baking tray with parchment paper and bake from 13 to 15 minutes.
Take them out of the over and let them cool completely.
ENJOY!
If you make this recipe, Tag Me! @mrssublimebakes and my niece @redhair_royalty
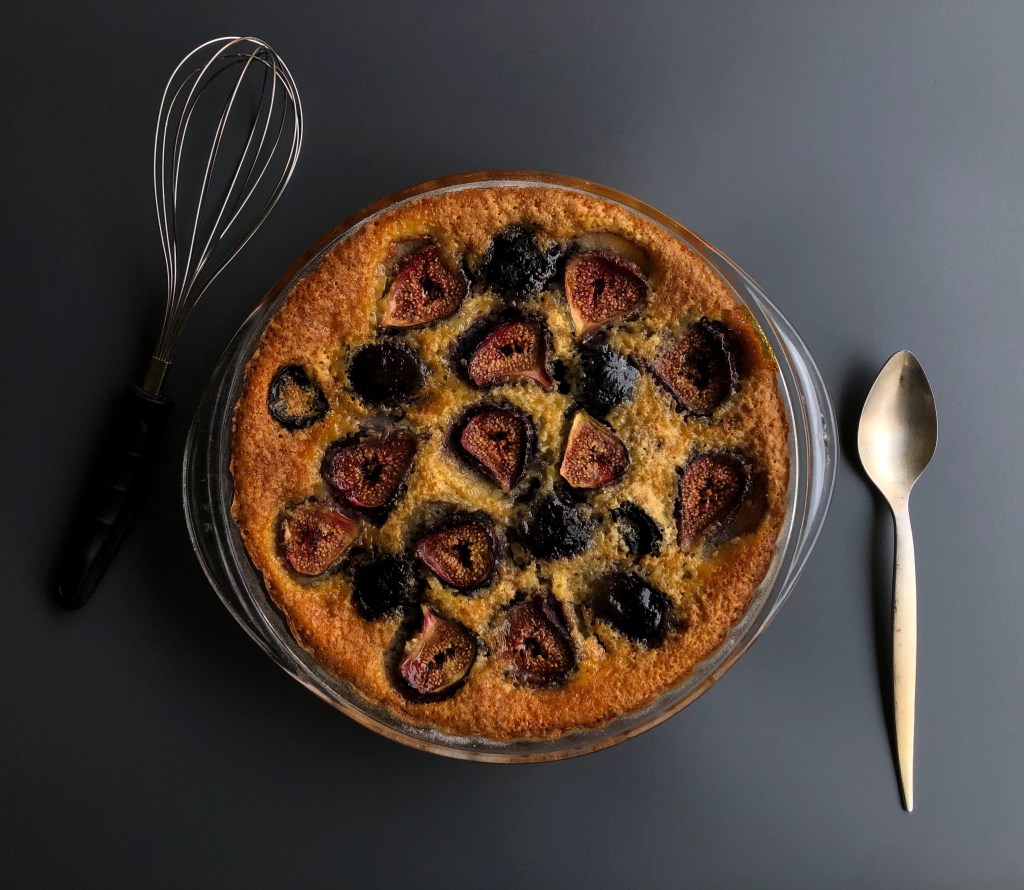
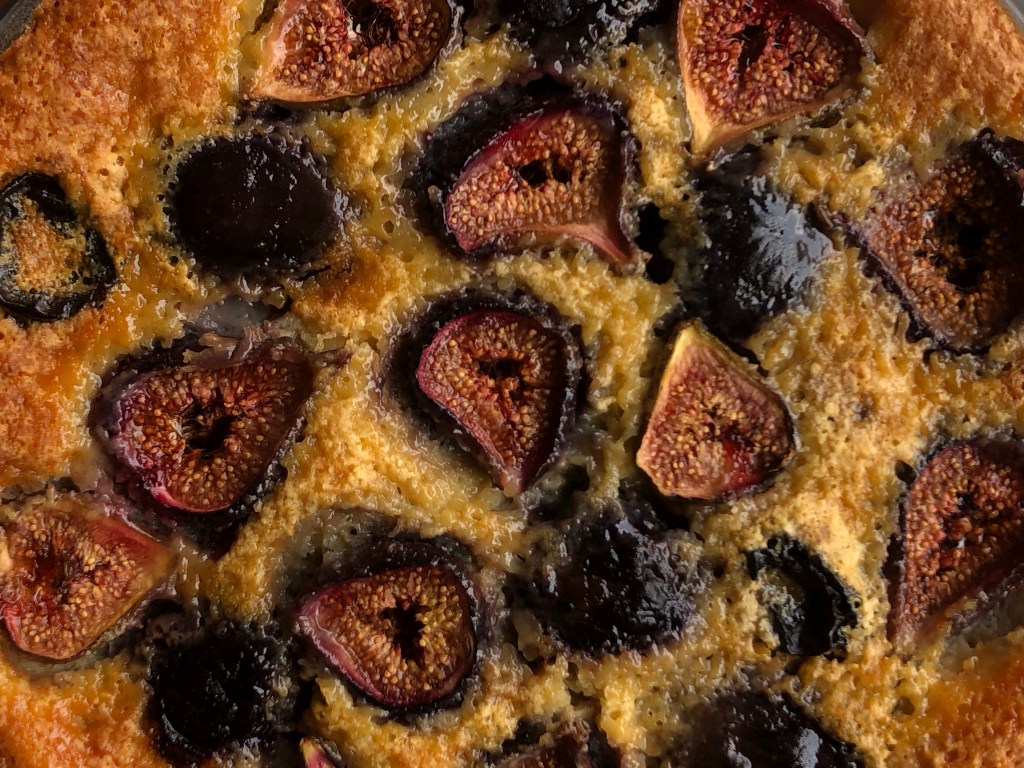
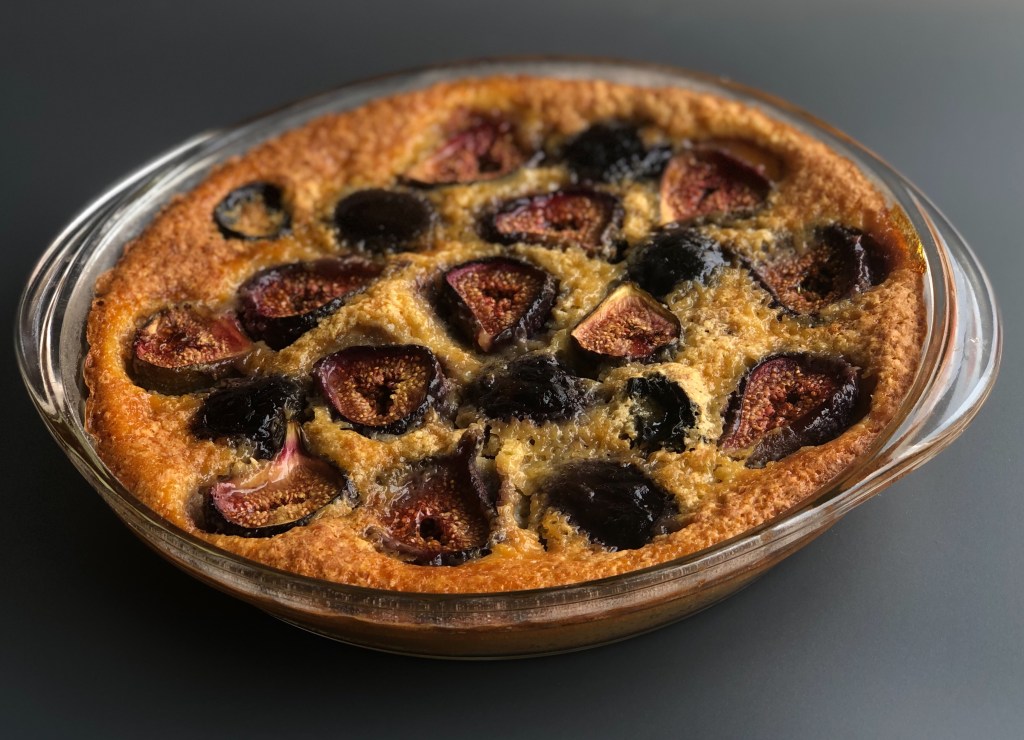
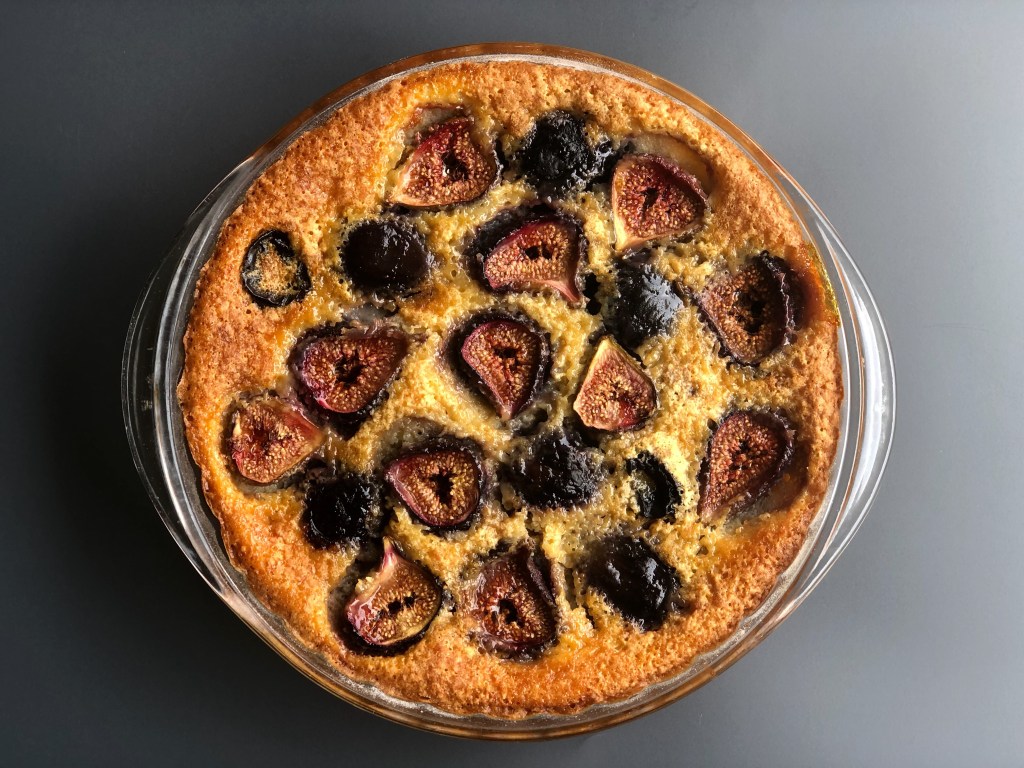
Ok, listen … if you want a delicious, creamy and easy dessert; Clafoutis got your back. You can make it as fancy as you want or keep it simple.
Clafoutis is originally from Limousin, France and became very popular in the XIX century. The texture is a mixture between a custard and a cake (but definitely leaned more on the custard side). This “egg batter” is combined traditionally with fresh black cherries, and of course you have the option to substitute the fruit with almost whatever you want, and it would be more proper to call this recipe a flaugnarde because it doesn’t have cherries; but to make it more accessible to people (because the name is more popular) we’ll stick with Clafoutis.
What about changing the fruit? Are there some rules?
Well, I wouldn’t call them rules (at the end of the day you can do whatever you want) but to get a perfect consistency and the right flavor in every bite, you have to choose:
Fresh Fruits Always! If you use frozen ones your baking time will increase and for that reason the parts that the fruits couldn’t reach will have a drier texture and where the fruits are would end up super moist or even raw.
Use Fruits That Would Hold their Shape. Cherries and figs have both a not so soft and no so hard pericarp, so when they are baked, they can hold their shape. Apples and blueberries can be another good examples. Try to avoid fruits that are very susceptible to osmosis like strawberries, raspberries, blackberries, etc. Otherwise your Clafoutis will end up smushed around the dessert and won’t have the desired texture.
Now that we have settle a bit of information, let’s get down to business…
The Recipe
This recipe fills up a 9” Round Ceramic Pie Dish.
Ingredients:
39 g Egg yolk (or 2 egg yolks from 2 large eggs)
148 g Whole Eggs (or 3 large eggs)
246 g Sugar
49 g All Purpose Flour
5 g Baking Powder
246 g Whole Milk
246 g Heavy Cream
5 ml Vanilla Extract (or 1/2 vanilla bean)
20 g Whiskey
450 g Fig
Instructions:
Mix together all the ingredients (except the fig) in a bowl till they are combined (no need to use a mixer, just a regular whisk. We don’t want to creat an emulsion, just to have everything well integrated).
Cut the figs in halfs and place them in either a ceramic pie dish or cake mould (you can save the prettier ones to put on top so they show better), make sure to lightly spread butter on it first and some flour so when you cut in it would be easier to take out.
Pour the egg and milk mixture over the fig (add the remaining fig halfs facing up to help with color balance) and bake at 160ºC or 350ºF for around 50 min. Let it cool completely and you can dust a little bit of icing sugar on top and whip some cream to garnish each slice.
As easy as that…
I like to cook mine a day before serving so it can rest and finish setting in the fridge overnight (it makes it easier to cut and serve).
If youhappen to make this delicious recipe TAG ME! Instagram: @mrssublimebakes
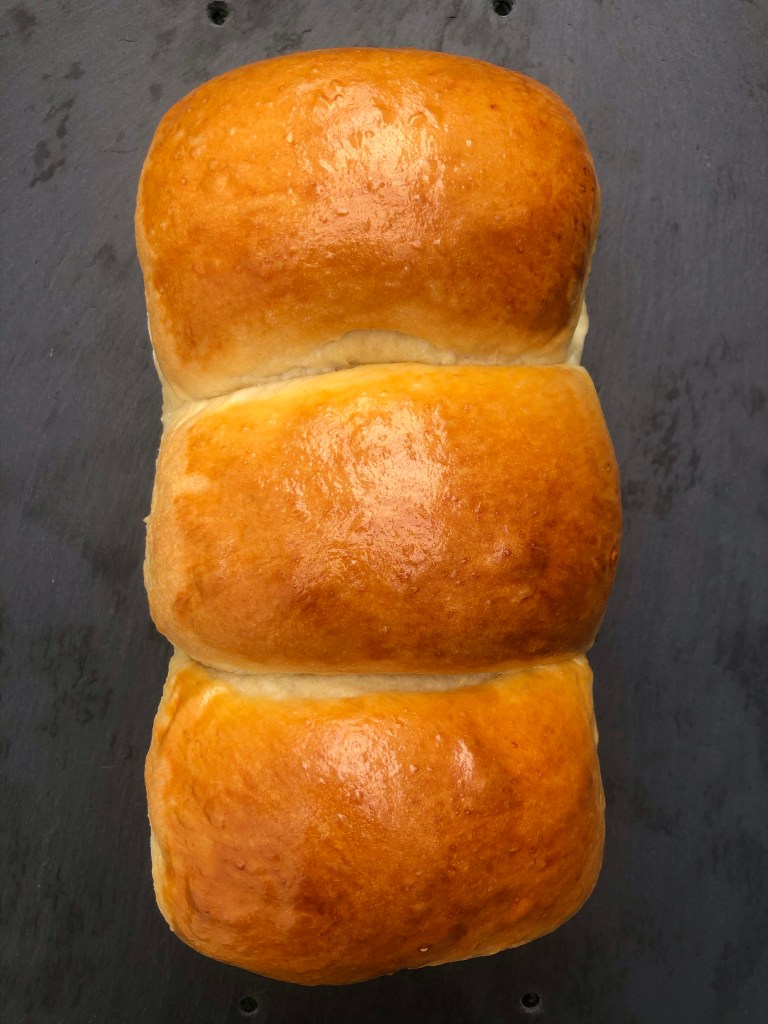
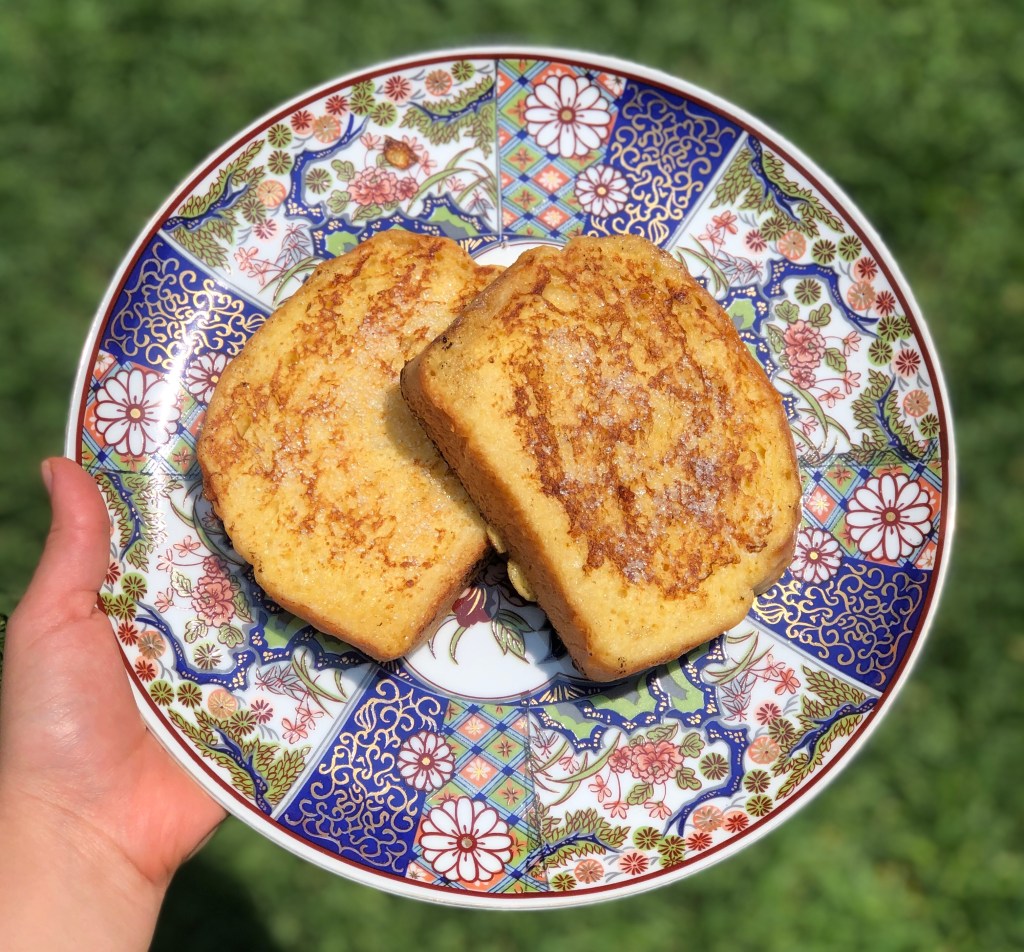
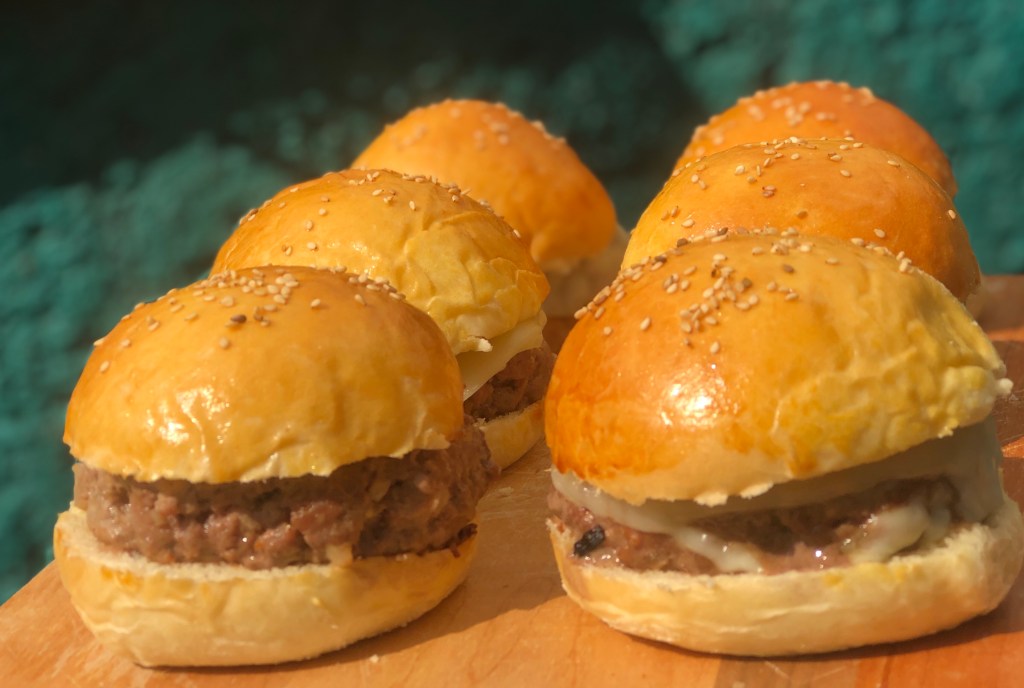
I’m very attached to this recipe because I use it for everything! Burger buns, hot dogs, sweet rolls, sandwiches … and the list goes on an on. Seriously! Try making some french toast with this fluffiness, game changer!
Freshly made French Toast!
A friend of mine, actually, gave me this recipe when we where working as teachers in a culinary university in Mexico City, and of course shortly enough it became a must in every school event and our lunches. There where a few days when I made fresh french toast with this bread just to have a happy breakfast with my students #missingtheolddays.
But anyway, I encourage you to try it and have fun with it. Here is the recipe…
The Recipe
This recipe makes 1 loaf of white bread (or 6 buns of 100g)
Ingredients:
240 ml Milk
35 g Sugar
5 g Instant Yeast
5 g Salt
317 g Wheat Flour (all purpose)
53 g Butter
Egg Wash:
1 Egg Yolk
5 ml Vegetable Oil
3 g Salt or Sugar*
* Depends on what do you want it for *
* If you are using a stand mixer: Same steps, but just make sure your butter is at room temperature *
Procedure
Warm up your milk just a little bit (if using cold milk 40 seconds, if not, a little less). Pour your sugar in the warm milk and stir to help it dissolve. Sprinkle the instant yeast over the milk and let it sit for 5 minutes to activate it. Then stir.
In a separate bowl, weight your flour and combine it with the milk mixture. Once you get a sticky dough, place it on a clean table and (without adding any extra flour, and with the help of a scraper) start working the dough until you get rid of most of the stickiness.
In a glass, mix your salt with a little bit of water just to dissolve it. Pour it over the table and integrate it into the dough while kneading it.
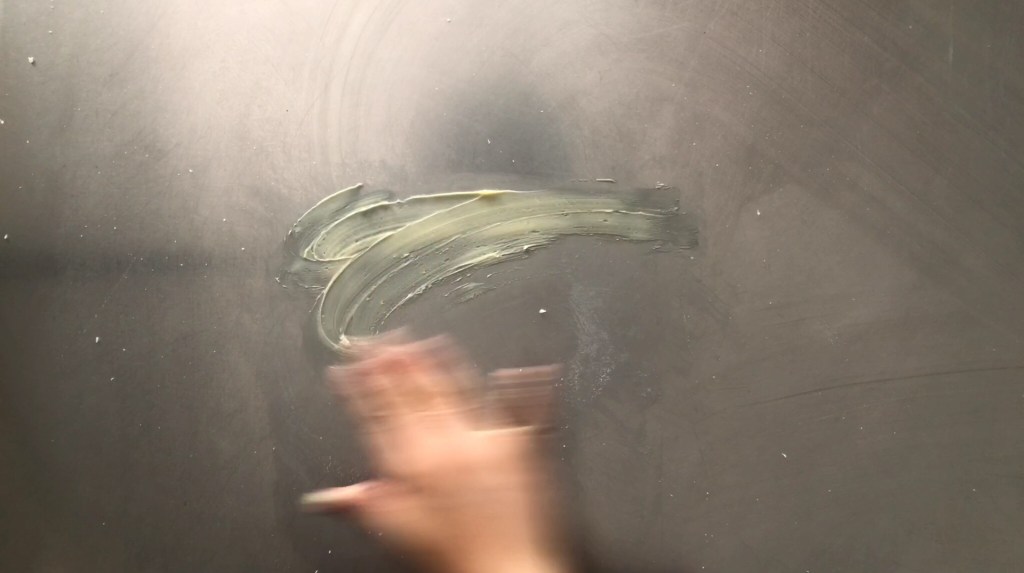
Once you’ve got a stable dough again, spread the butter all around your working place and integrate into the dough. Keep kneading until you get a smooth fluffy dough.
Butter spreading
Place the dough into a lightly greased bowl and cover it up with a towel or plastic. Rest it for 30 minutes.
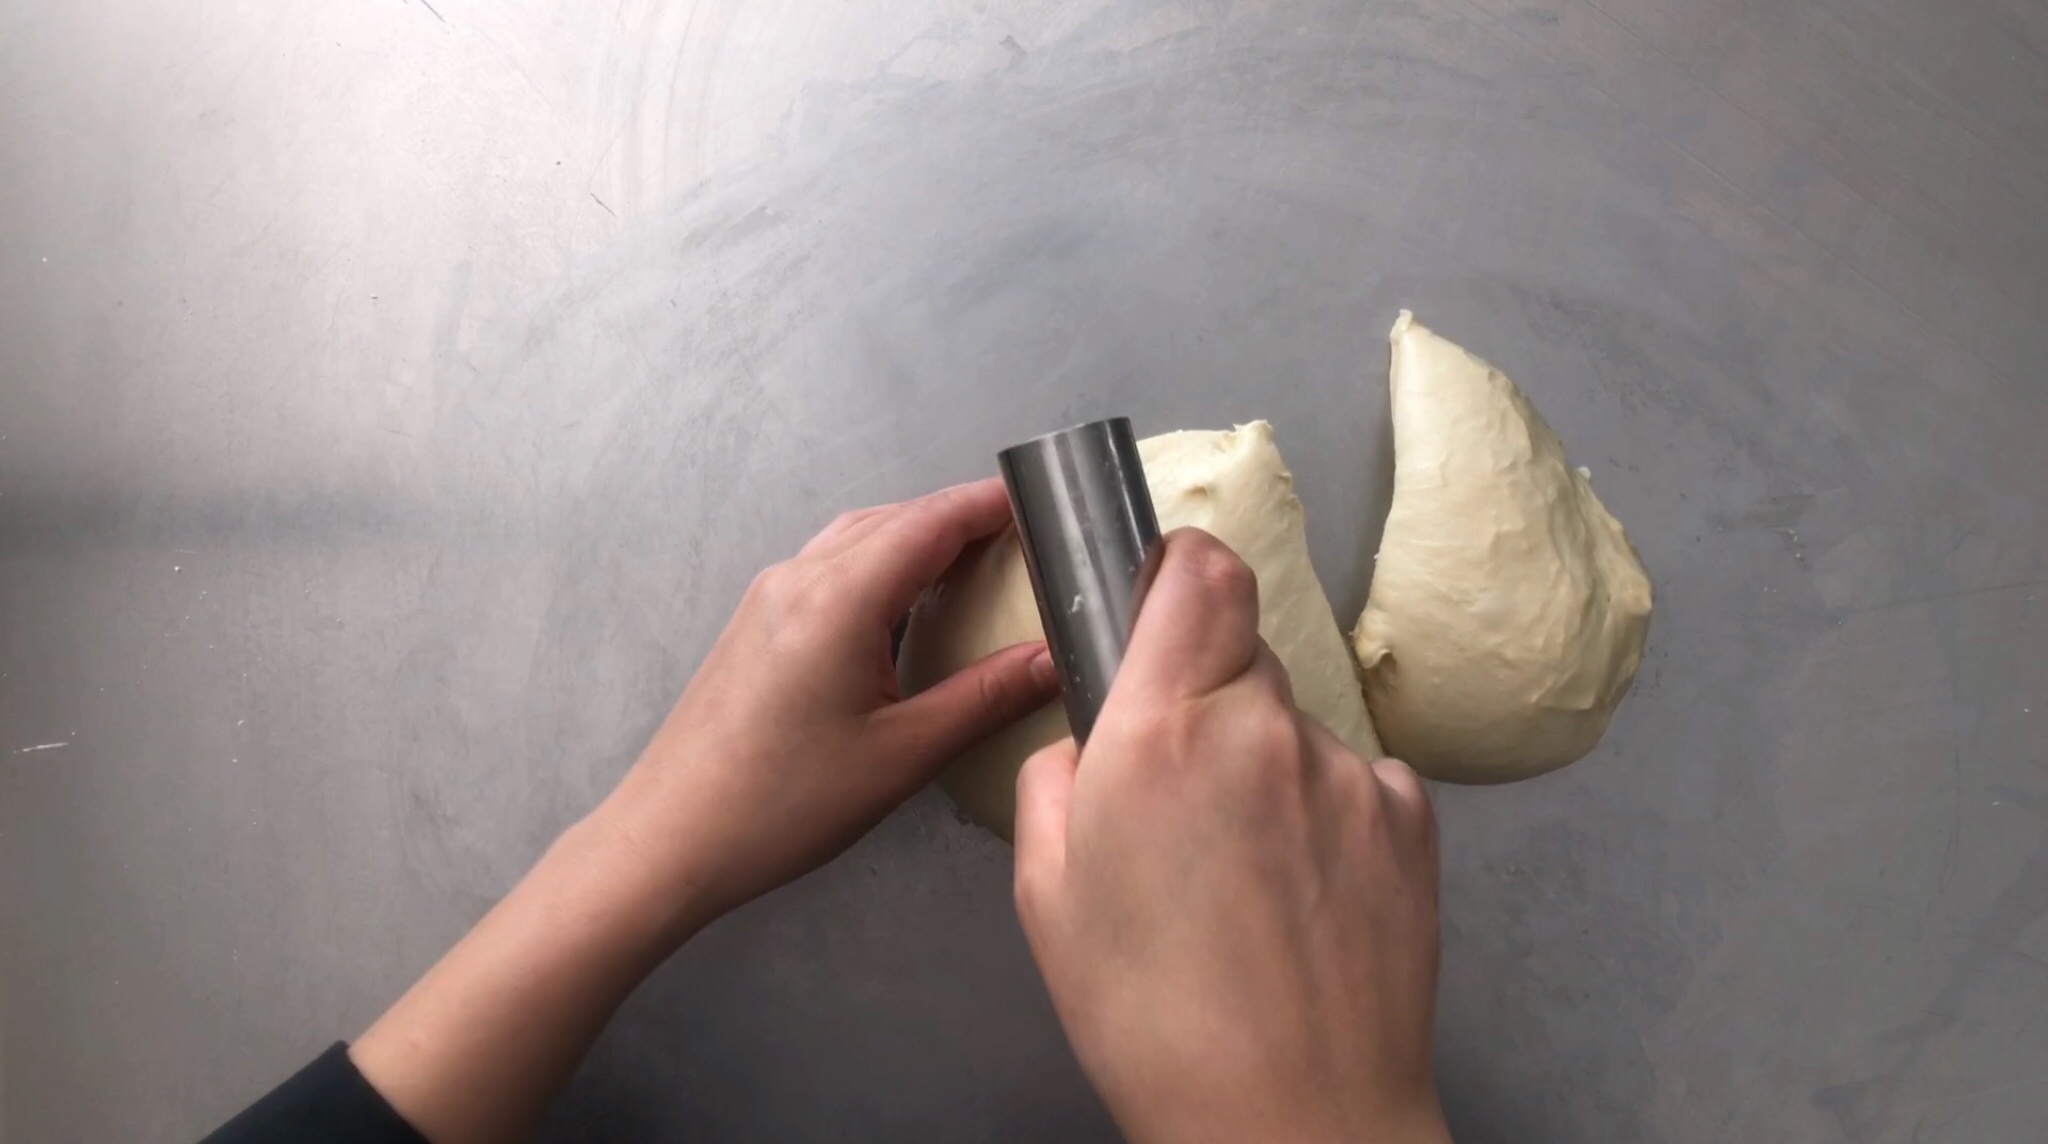
Get your dough into the table again, and roughly cut it into 3 pieces. Use a scale to make sure they are the same weight (if not, compensate from one another until they all weight the same)
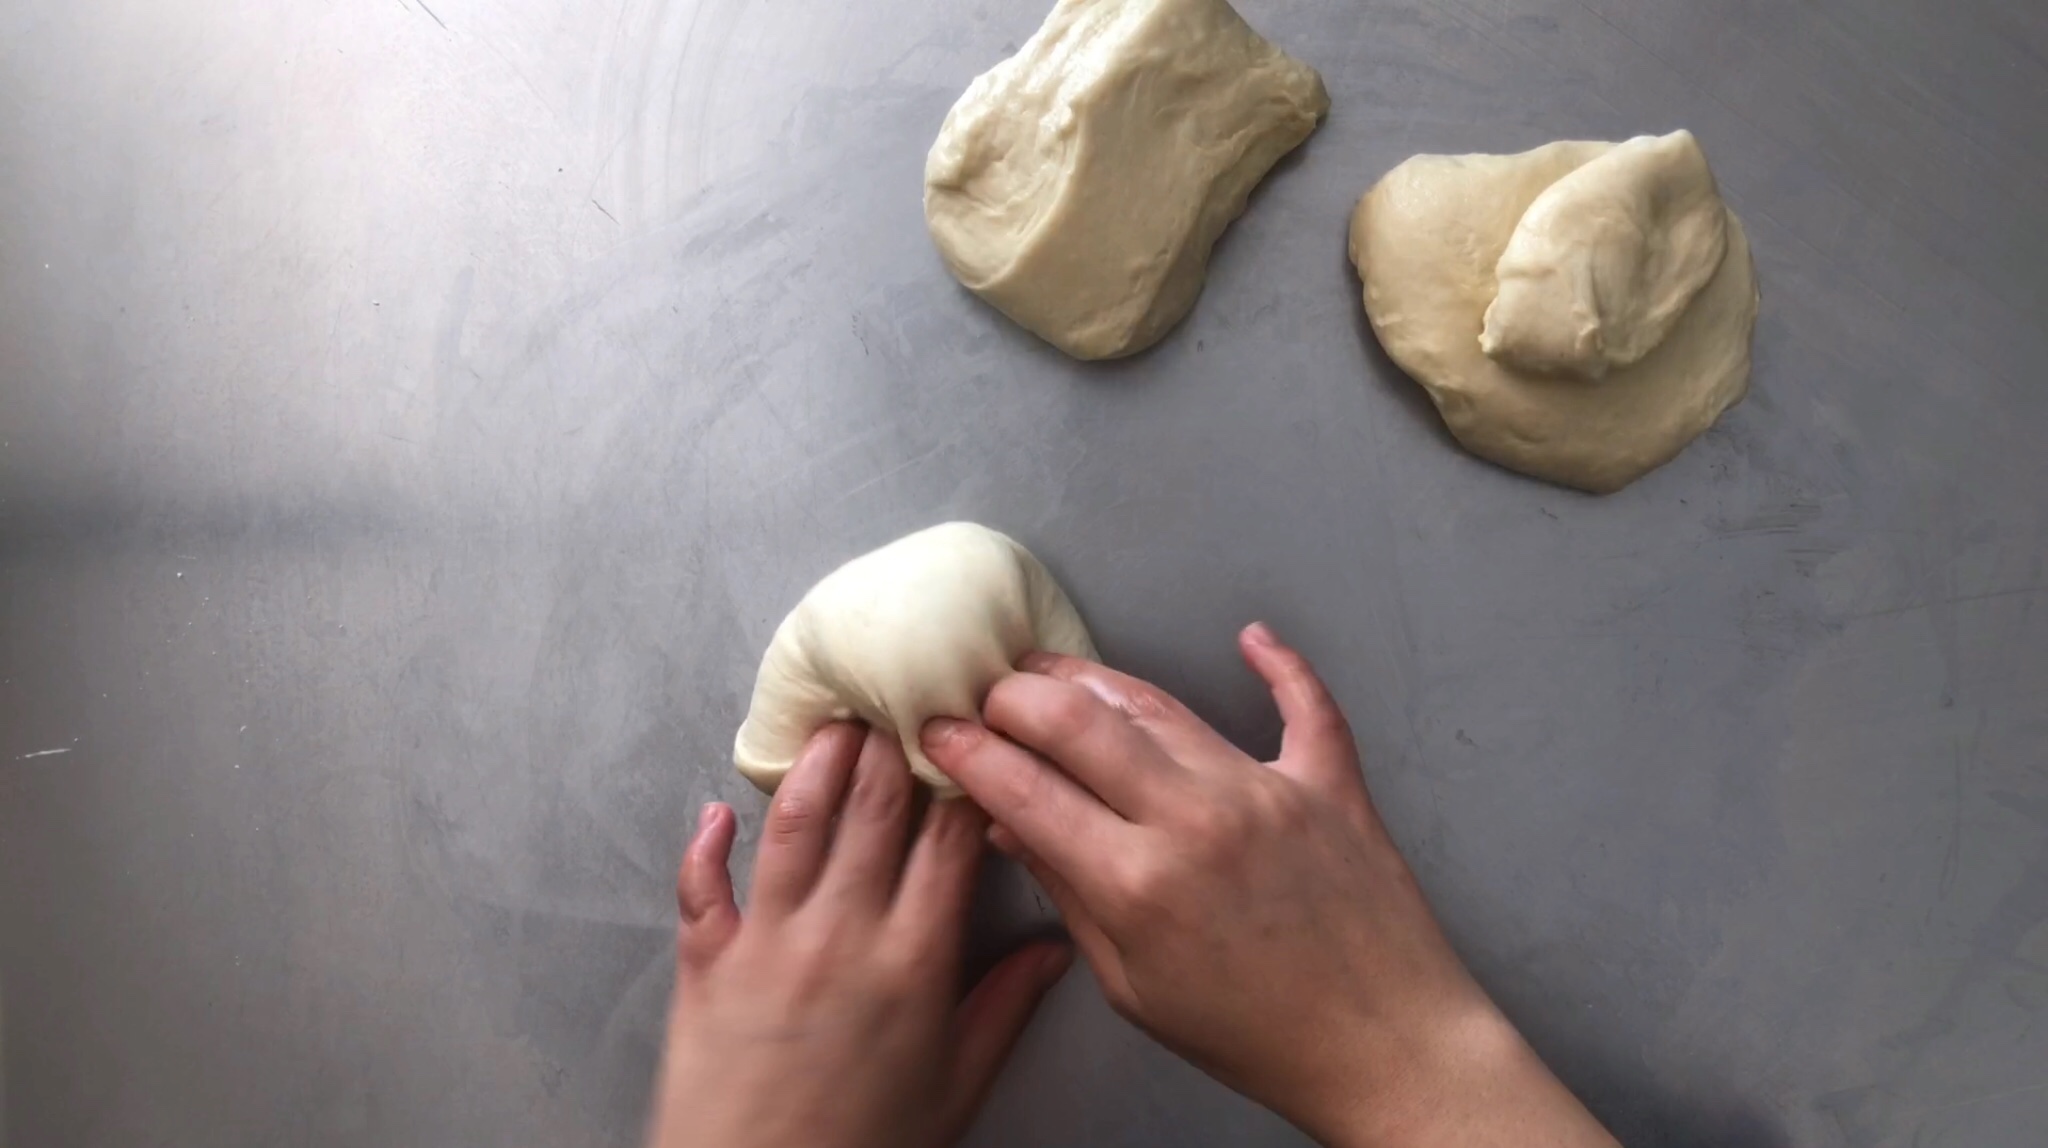
Take one piece and with the help of your fingers, press it down to the table and roll it while pinching it to secure it. Then pinch the lateral ends to each other (if needed, pull and pinch from the sides to help it shape into a ball).
Turn the ball upside down so the seam is touching the table. Rotate the ball with your hands making sure the smooth side is facing up all the time. When the bottom is tight enough, (you’ll know it is when the ball starts rotating a bit by itself the other way) reserve it and do the same with the other ones.
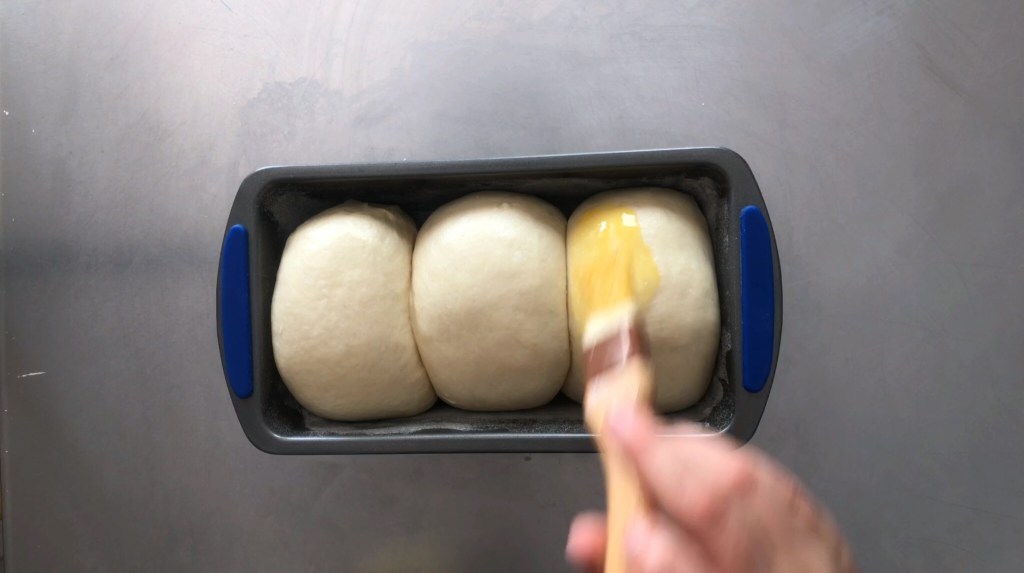
Place the dough balls in a line inside a previously greased rectangular mold, cover it up and let it rise for 30 minutes.
Combine in a cup the egg yolk, oil, and salt (or sugar). Once the dough has rise, use a brush to coat the loaf with the egg wash.
Egg Wash moment
Bake the loaf at 190 C / 374 F for 18 minutes.
Let it cool completely and enjoy 🙂
If you happen to make this super easy recipe, TAG ME! Instagram: @mrssublimebakes
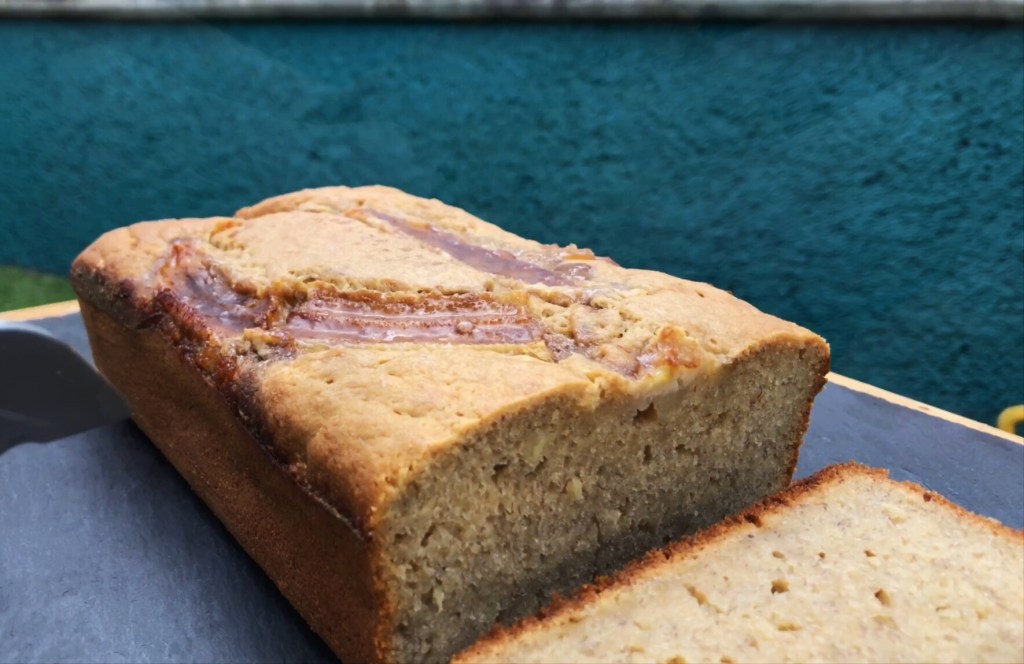
Sunday morning, rain is falling and craving a Banana Bread?
I get it … me too!
But don’t worry, I’ve got you. This recipe is foolproof and super easy to make.
This is the way that I make it but you can make some changes to get an even more delicious bread. But first, lets talk about ingredients:
Sugar: For this recipe I’m using “azúcar morena” (brown sugar). This is to get a richer flavor and a nice brown color in out bread, but it can be easily substituted with every other type of sugar except for piloncillo, icing sugar and artificial sweeteners (you would have to adjust the quantity and in the case of the Icing sugar, the consistency of the bread is going to change to a more dense product).
Butter: Using melted butter helps the bread to get a bit lighter than just soften butter. You could use vegetable oil too but butter enhances the banana flavor. (If you want to get a richer flavor, brown the sugar a bit and let it cool).
Eggs: There’s no need to get the expensive organic ones, but try to use the biggest ones. A bigger egg means more egg white which contains protein and helps trap air when you beat them so your mixture will stay fluffy throw out the baking process.
Sour Cream: The key for moisture! But it can also be substituted for natural greek yogurt.
Bananas: As ripe as they can get. Have you ever peeled a banana that is too ripe and you can see water coming out of it? … That is sugar turning into water. When there’s too much water in a product, bacteria gets a chance to reproduce and so the product goes to waste. So we don’t want them saggy, but a nice slightly brown ripe banana. (To intensify the flavor, you can put them on the oven for a few minutes until the peel gets completely brown).
Flour: In breads like this, it’s not so necessary to generate gluten because you’re using baking powder to inflate it. So you can pretty much substitute wheat flour with any other kind of flour. Just keep in mind that there are flours that absorb more liquids than others, so just try to add more liquid if it’s required to get the same consistency.
I promise, your house will smell amazing. (You can add some spices as cinnamon and cardamom if you want to)
video
The Recipe
This recipe makes 1 loaf of Banana Bread
Ingredients:
113 g Brown Sugar
2 g Salt
158 g Melted Butter
2 Eggs
60 g Sour Cream
4 Ripe Bananas (leave one for decoration)
260 g All Purpose Flour
8 g Baking Powder
Preparation
In a bowl, mix together brown sugar, melted butter and salt until you get a “paste” and the color of the sugar changed a little bit.
Add the eggs and mix until it’s light and fluffy. (I’m using a hand electric mixer but you can do this with a whisk or a fork). Get the sour cream in there too.
Take 3 of your bananas and cut them into peaces (it doesn’t have to be pretty, it will get mixed anyways), if you would like, you can make a pure before hand but I just like chunks of banana on the bread. With the mixer (or whisk or fork) press the bananas to the bowl and mix really well.
Combine the flour and baking powder, incorporate them into the mixture… don’t over mix it!
Prepare a mould with butter and flour, pour the mixture in there (make sure you don’t fill the mould to the top, we don’t want it to drip).
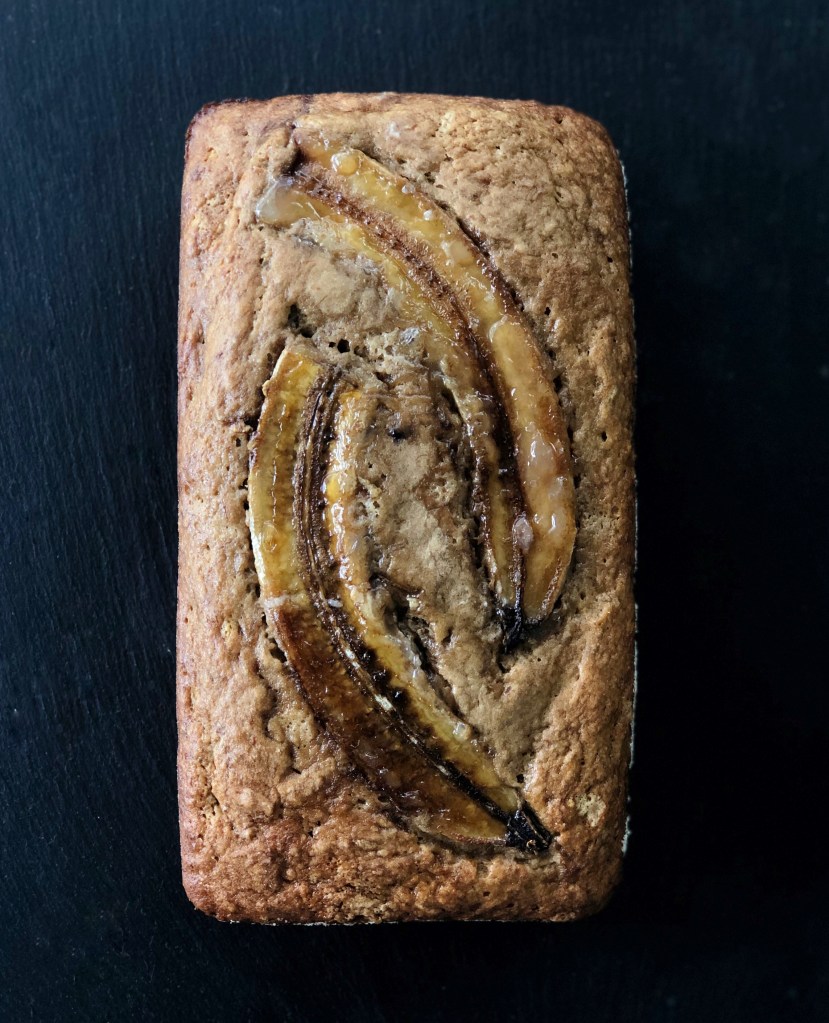
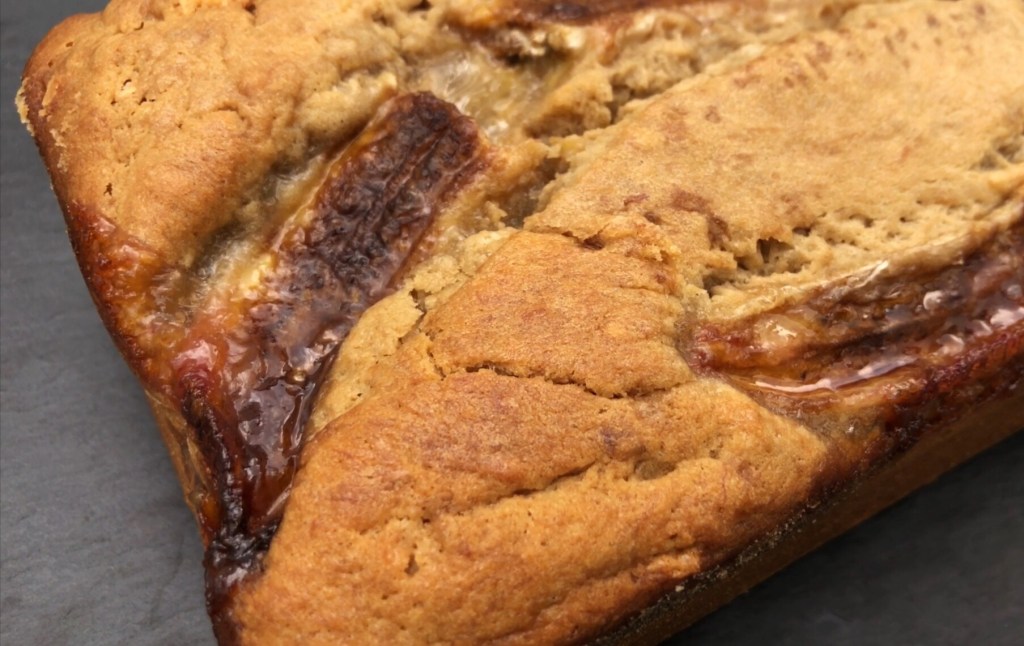
Take the remaining banana and cut it in half from the tip to the bottom. Place one half, with the inside face up, on top of the mixture leaving space for the other half. Do the same thing with the other one.
Sprinkle a little bit of brown sugar on top of the bananas. Bake it for 45 – 50 minutes at 175 C.
Let the loaf cool down and enjoy it with a cup of your favorite coffee or tea. I like to take mine with matcha latte!
If you want to make this delicious bread, TAG ME! Instagram: @mrssublimebakes
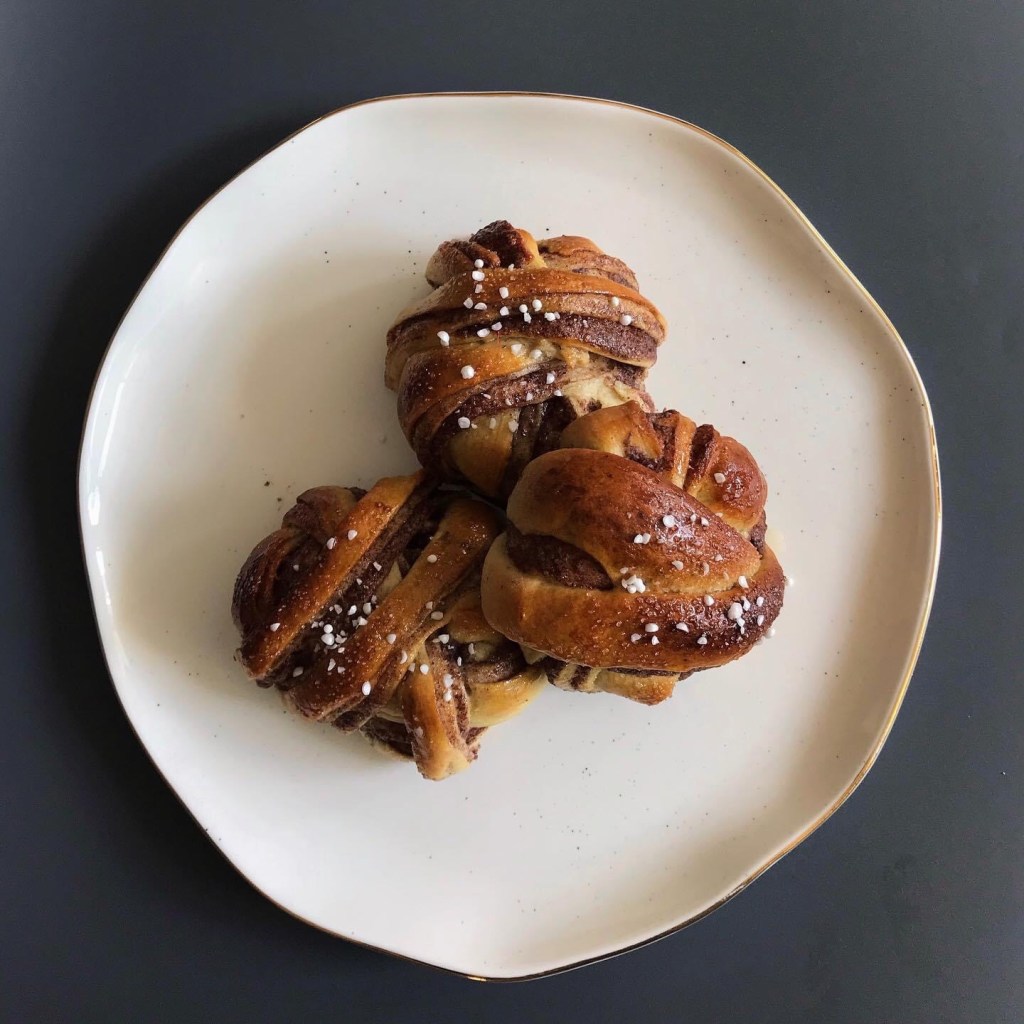
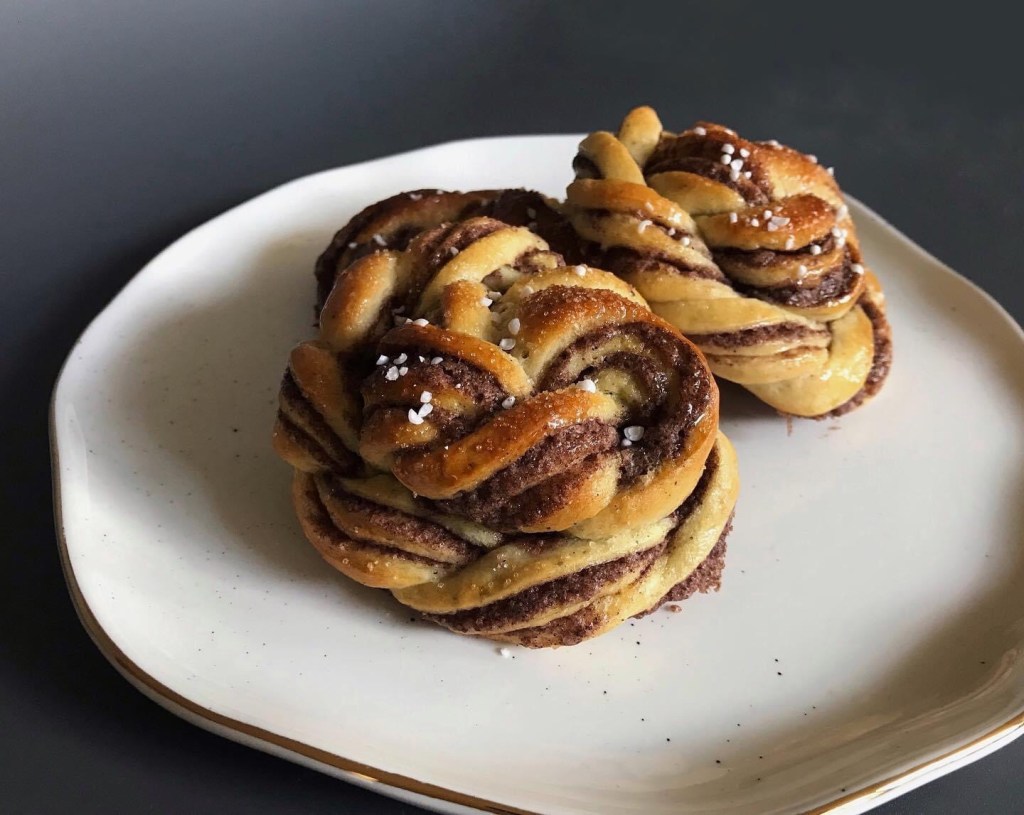
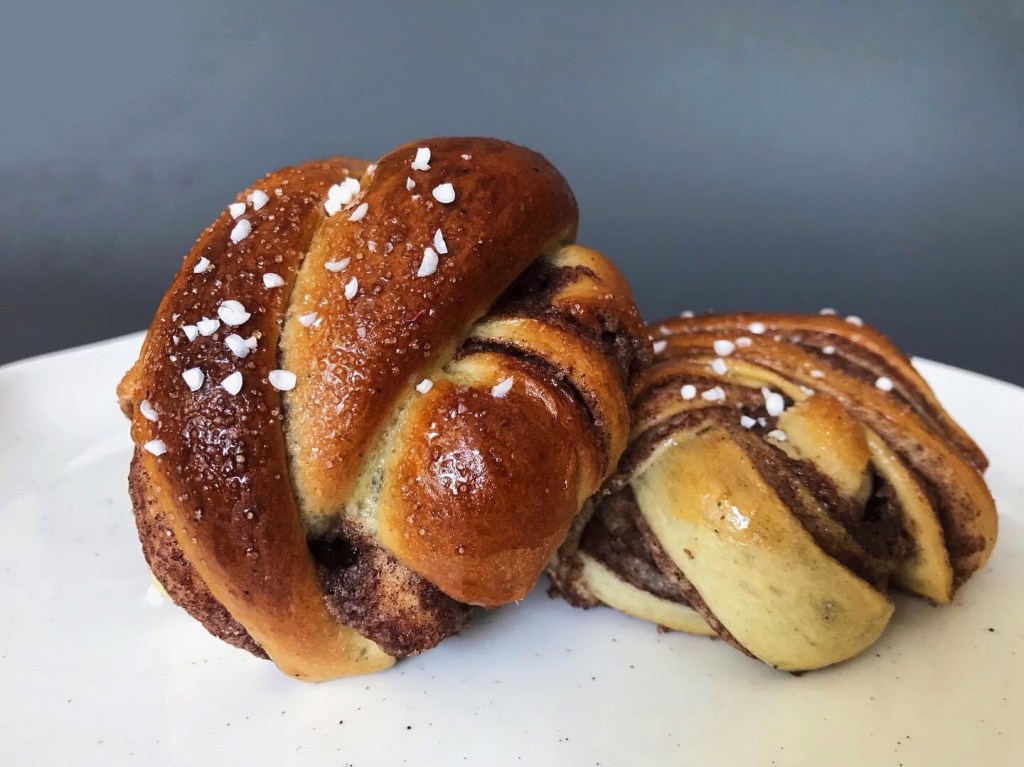
Have you ever wondered where the very popularized Cinnamon Roll came from?
Well, most researchers have tracked its origin to Sweden around the mid-1700’s. In 1999, the Hembakningsrådet (Swedish Home Baking Council), invented the Kanelbullens Dag (International Cinnamon Roll Day) to celebrate it’s 40th anniversary on October 4th, but Swedish people have it every other day. A kanelbullar is not a stranger in a Swedish diet, specially with Fika, a well known tradition when people take breaks between meals with their friends, family and colleagues to enjoy a pastry or snack with coffee.
I’ve got a chance to visit Sweden in 2019 and had one of this fantastic goodies. My whole vision of what a Cinnamon Roll should taste like was changed and I’m glad it did.
So … What makes this version of the Cinnamon Roll so special and different from others?
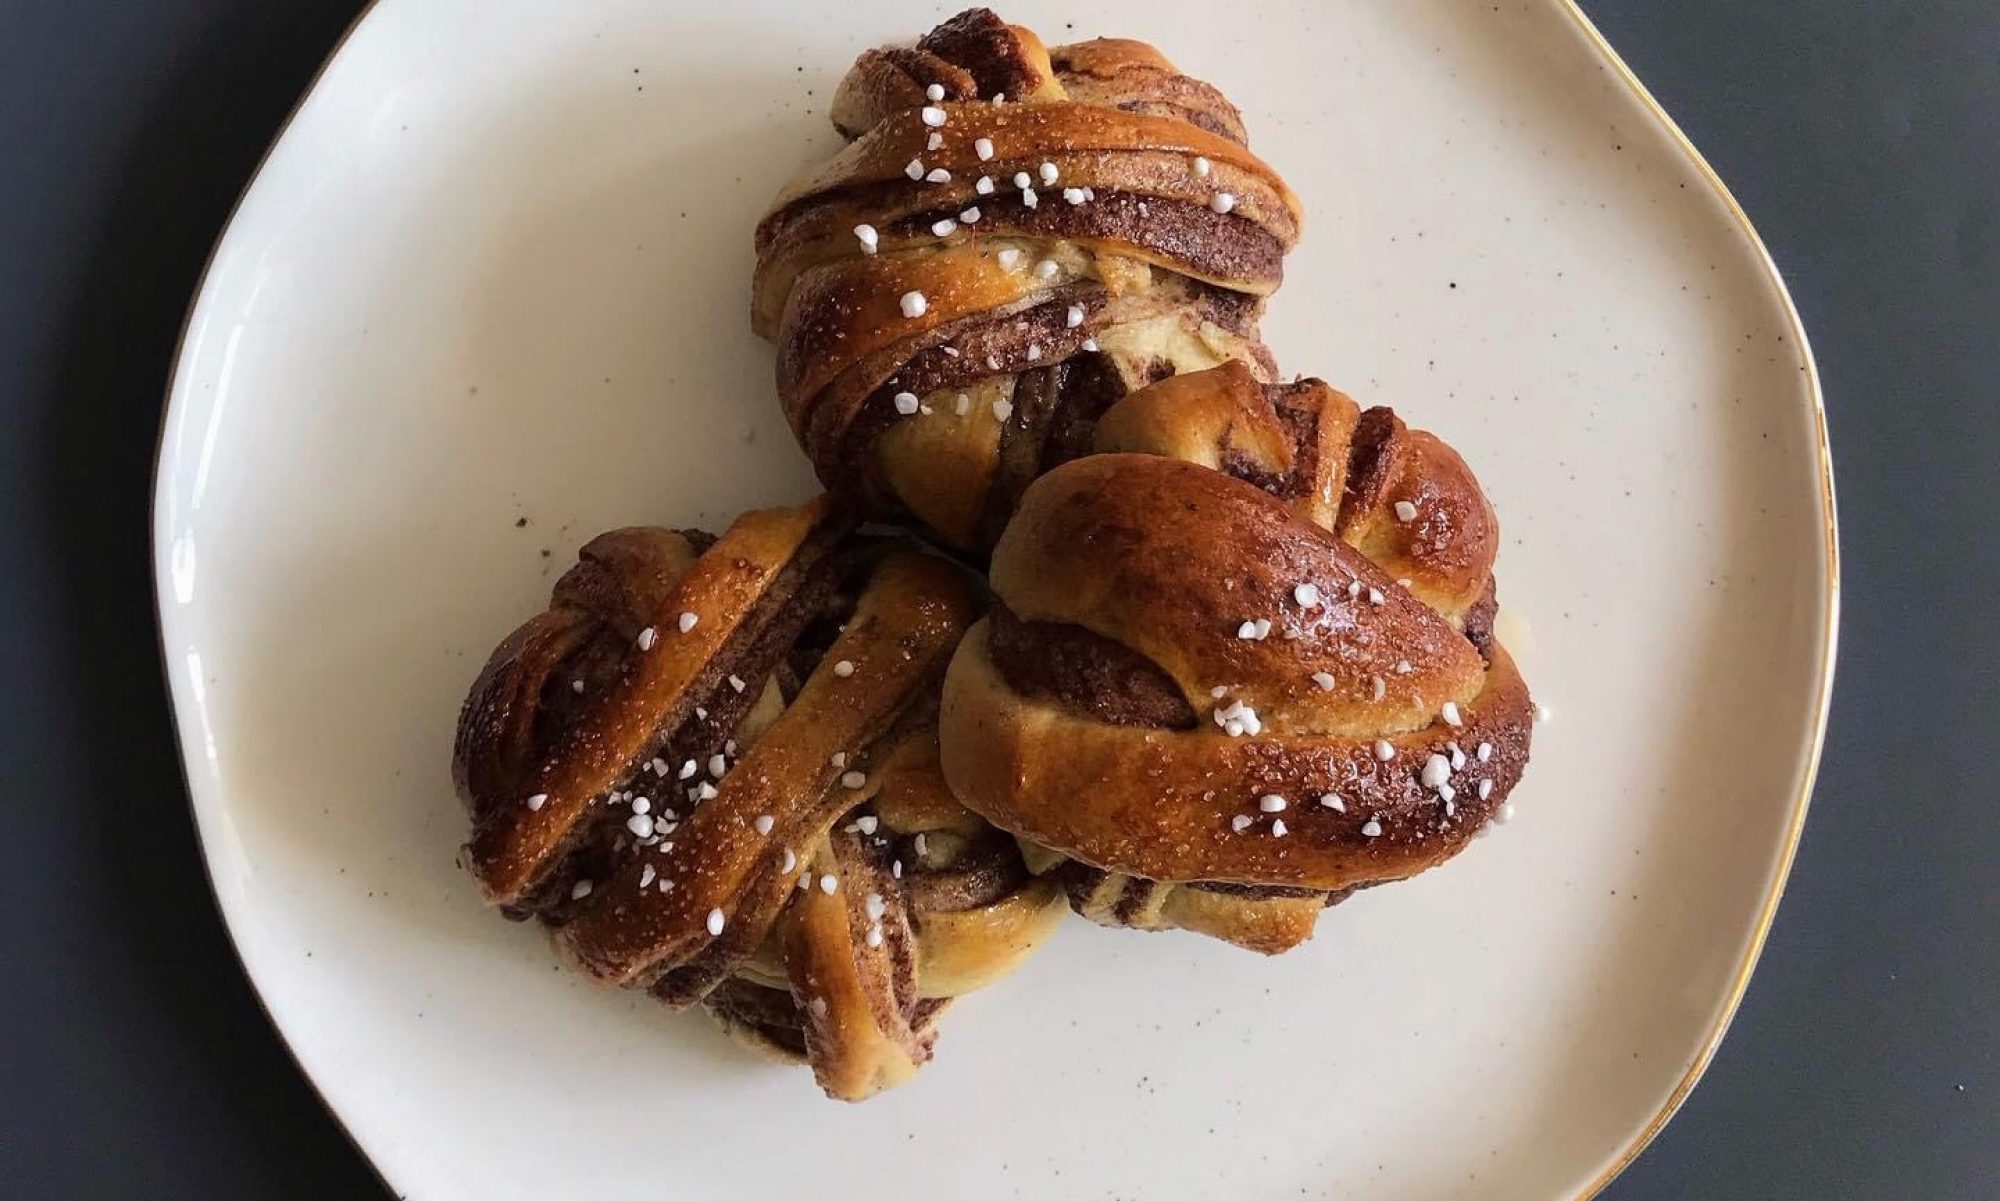
The Twisted Knot
Lets break down the Basics:
Ingredients: Cardamom really changes the game in this recipe, giving the dough an extra punch of flavor and aroma. It’s very common to use pearl sugar as a topping for the kanelbullar but you can also add a White Icing or Chocolate Icing; on the other hand you can see standard Cinnamon rolls topped with Cream Cheese Icing, this neutralizes the flavor of cinnamon and make it way more dense.
Shape: There are differenttypes of shaping for the kanelbullar. Starting from the most traditionalThe Knot, this shape it’s all about rolling strings of dough around your fingers and tucking the end. The Twisted Knot, this shape is used mostly for Cardamom Buns and it consist of twisting one or two strings of dough to get a spiral, then roll the spiral around itself to make the dough look kind of a flower. The Snail or The Cut Roll, this one is the most simple, roll the dough and cut the log into slices, just like the regular Cinnamon Roll. The Cut Roll Braid, this one is almost the same as the last one, but instead of cutting each slice all the way through the dough, stop almost at the end so that the slices are still attached on the bottom. Then, chose one of the ends of the log and move one slice to the right and the next one to the left and so on, so then you’ll end up with a long bread that looks like a braid. The list goes on and on, but this are the main shapes for kanelbullar.
Texture: Most Cinnamon Rolls are known to be super fluffy and crazy big. Kanelbullar is a bit different, because of the shaping makes the dough a little more compact and more “flaky” than fluffy, and you get to taste the cinnamon filling in every single bite.
Now that we are more familiarized with the kanelbullar, lets get to business…
Video Recipe
The Recipe
This recipe makes about 20 buns of 60g each.
Pre Dough
250 ml Milk
350 g Wheat Flour
20 g Fresh Yeast, or 10 g Dry Yeast
Dough
250g Wheat Flour
75 g Sugar
2 Eggs
10 g Cardamom
75 g Butter
5 g Salt
Cinnamon batter
200 g Butter
250 g Sugar
60 g Wheat Flour
30 g Cinnamon
Egg Wash
1 Egg
10 ml Milk
3 g Sugar
– Pearl Sugar *optional*
Additional *These are in case you would like to add extra flavors to your dough*
10 g Rose-hip Shell Flour
10 g Vanilla Sugar
10 g Malt
DAY 1
In a bowl, mix together the ingredients for the Pre Dough until they are well incorporated. Leave the dough to rest for 10 minutes at room temperature and knead it for 5 minutes (you can use a stand mixer for kneading, I did it all by hand). Place the dough back to the bowl and cover with plastic. Let it rest on the fridge over night. *If you are planing on doing this recipe in 1 day, then at this point let the dough rest 3 hrs at room temperature and then continue with the instructions of Day 2*
DAY 2
Take the dough out of the fridge and deflate it with your fingers. Add the eggs, sugar, flour and cardamom, integrate with the dough and add the butter. Drop the dough to a clean table (or stand mixer) and knead until the dough is smooth. Place the dough in a clean bowl and cover it up, let it rise for 40 min.
Mix together the butter, flour, cinnamon and sugar of the Cinnamon Batter. Leave it at room temperature.
Dust the surface of the table with flour and place the dough on top of it. Dust a bit more of flour over the dough and use a rolling pin to extend the dough into a rectangle (about 73 cm X 57 cm, 7 mm thick). With a spatula, spread the Cinnamon Batter on 2/3 of the dough in an even layer. Make a Letter Fold by placing the 1/3 of the dough without spread over another 1/3 with spread, and then the remaining 1/3 over the folded parts. Place the dough facing you horizontally and extend a little more without adding too much pressure (we don’t want the spread to leak). Cut stripes of dough of about 2.5 cm (1 inch) wide.
To shape the dough, extend with your hands a little a stripe and roll it around 3 or two fingers. When reaching the end the stripe, tuck it in between your fingers making a loose knot. Place the knots in a baking tray with parchment paper and let them rise for 30 min.
Preheat the oven to 200 C (428 F). Mix the egg, milk and sugar of the Egg Wash and lightly brush the knots with it (sprinkle a bit of pearl sugar over the knots if you’d like). Bake the knot for 12 minutes (if you want a little more of color, bake for another 4 minutes tops).
Let the buns cool down and enjoy with a cup of coffee, tea or milk! I hope you’ll enjoy this recipe and impress someone with a surprise Fika.
If you happen to make this delicious treats, TAG ME! Instagram:@MrsSublimeBakes
This recipe was inspired by Nicholas Hemsida and Magnus Nilsson.